Friday, April 17, 2015

Baby Maker Cider


So time to post again, I have had a few brews since last posting, but I think this is one of my cider favorites. Whats with the name you ask? If you drink it, it doesn't seem like its alcoholic until it hits you. At a whopping 7.6% this one will sneak up on you, just like the surprise that sneaks up on you 9 months after you drink this. I was actually surprised that my best hard cider to date was made with Motts Apple Juice, after trying numerous attempts with local New England Ciders from many orchards. However looking back it is clear to me now that the consistency in the Apple Juice will bring about the ability to perfect the recipe. This is version 1:

ABV: 7.4%
OG: 1.068
FG: 1.011

Ingredients:
5.5 Gallons Motts Apple Juice
2 lbs Dark Brown Sugar
1 lb Honey
1 lb Turbinado Sugar (Raw sugar)
US-05 yeast

Back Sweetening:
0.5 Gallons Motts Apple Juice
5 Campden Tablets
3 tsp Potassium Sorbate
1 lb Dark Brown Sugar
1/2 lb Honey
1 Tbsp Cinnamon
1 packet of unflavored gelatin

Take 0.5 gallons of the Motts, and heat it to 120F, while melting all the sugar into it. Pour the other 5 gallons into a fermentor and then pour the half gallon with dissolved sugar into the fermentor, and swirl it around to bring the temperature down then add the yeast.

Ferment for 2 weeks at 62 degrees.

I used gelatin to clear it mix 1 packet of unflavored gelatin in 0.5 gallons of Motts Apple Juice. Additionally add the campden tablets, potassium sorbate, sugar honey and cinnamon to 150F. Make sure not to go over or you risk the gelatin solidifying. Splitting the batch in half into 2- 5 gallon fermentors, carbonating at 12 PSI for a week.

Tasting Notes: Pleasantly Tart, remnants of the original Motts Juice. The back sweetening balances out the tartness, but is not overly sweet. the honey and dark brown sugar mixed with the cinnamon make it almost like a carmel hard apple cider.

Wednesday, July 16, 2014

Getting the most out of the brew day. (Making starter from trub)

When it comes to brewing I like saving money. I was making a batch of blonde ale, and I noticed how much dead space was at the bottom of the pot after siphoning off all the wort, the leftover trub mixed with wort.

I was thinking that it would be great to be able to extract more wort from the batch, especially since I would be brewing a bigger beer in a week or so. The beer I was brewing had an OG of 1.051, so what I did was add water to the pot, mixed it with the trub, then poured it into mason jars.


I ended up with about 3 mason jars from the 6 gallon batch that I brewed. I left the mason jars in the fridge overnight, and the next day wort had separated from the trub. The added water reduced the gravity only by about 0.006.

Then I poured them all out into a 4th mason Jar. I ended up adding a tad bit more water to each of them, about 2 oz more to each mason jar, then shook it up and repeated the process of leaving it in the fridge, to top off the jar.


At the end of the process I ended up with a full mason jar (3 cups/24oz), which saved me a bunch of DME. The other added benefit of this is that it does contain hops so it helps to preserve the starter.


Wednesday, February 12, 2014

Guter Weizen IPA

So I was in Disney World for the Epcot Food & Wine Festival, it was a great time. I went to the Germany showcase, and they had a beer called Indra, brewed by Braufactum. It was delicous. It was kind of like a dunkel, however it was a wheat based IPA. In my opinion it was a great combination of the two styles, and I had to brew it or something like it, it was portrayed as a fusion between a German wheat and an American IPA. And so began my journey to replicate this fine brew.

Going to their site and translating through Google Chrome, I was able to get the basic ingredients: Light Wheat Malt, Vienna Malt, and Caramel Malt, and the hops were Cascade and Magnum.

Notes were: A bright golden yellow color, slightly cloudy and with a slight head. Amazing opening aromas of oak, and behind that are a mixture of honey, orange soda and spices emerge. On the palate the blends of an earthy undertone with an herbal finish.

Going with these I formulated the following grain bill:

1 lbs Caramel Wheat Malt
1 lbs Caramunic Malt
5.5 lbs Pale Malt (2 Row) Belgian
6 lbs Vienna Malt

BIAB (Brew in a bag):
Mash  @ 153F for 60 min
If BIAB (Brew In A Bag) Raise Mash temp to 168F for 10 min otherwise Sparge with water @ 168F

90 min boil
0.5 oz Magnum @ 60 min
0.5 oz each Magnum & Cascade @ 30 min
1 oz Cascade @ 5 min
1.5 oz Cascade Dry Hopped 5 days

Yeast: WLP300 - Hefeweizen Ale Yeast

I typically ferment for 7-10 days in the primary, with the WLP300 I started out at 65 and slowly raised the temp to 70, to bring out the banana esters from the yeast, but not so much that they were over powering. I then rack the beer to a secondary for about two weeks where at the end of the first week I added the dry hops.

The beer came out great. The color was a bit off, but the taste was close enough from what I remember, because I have not been able to find that beer anywhere else, for comparison.


Taller Collar Keezer Build


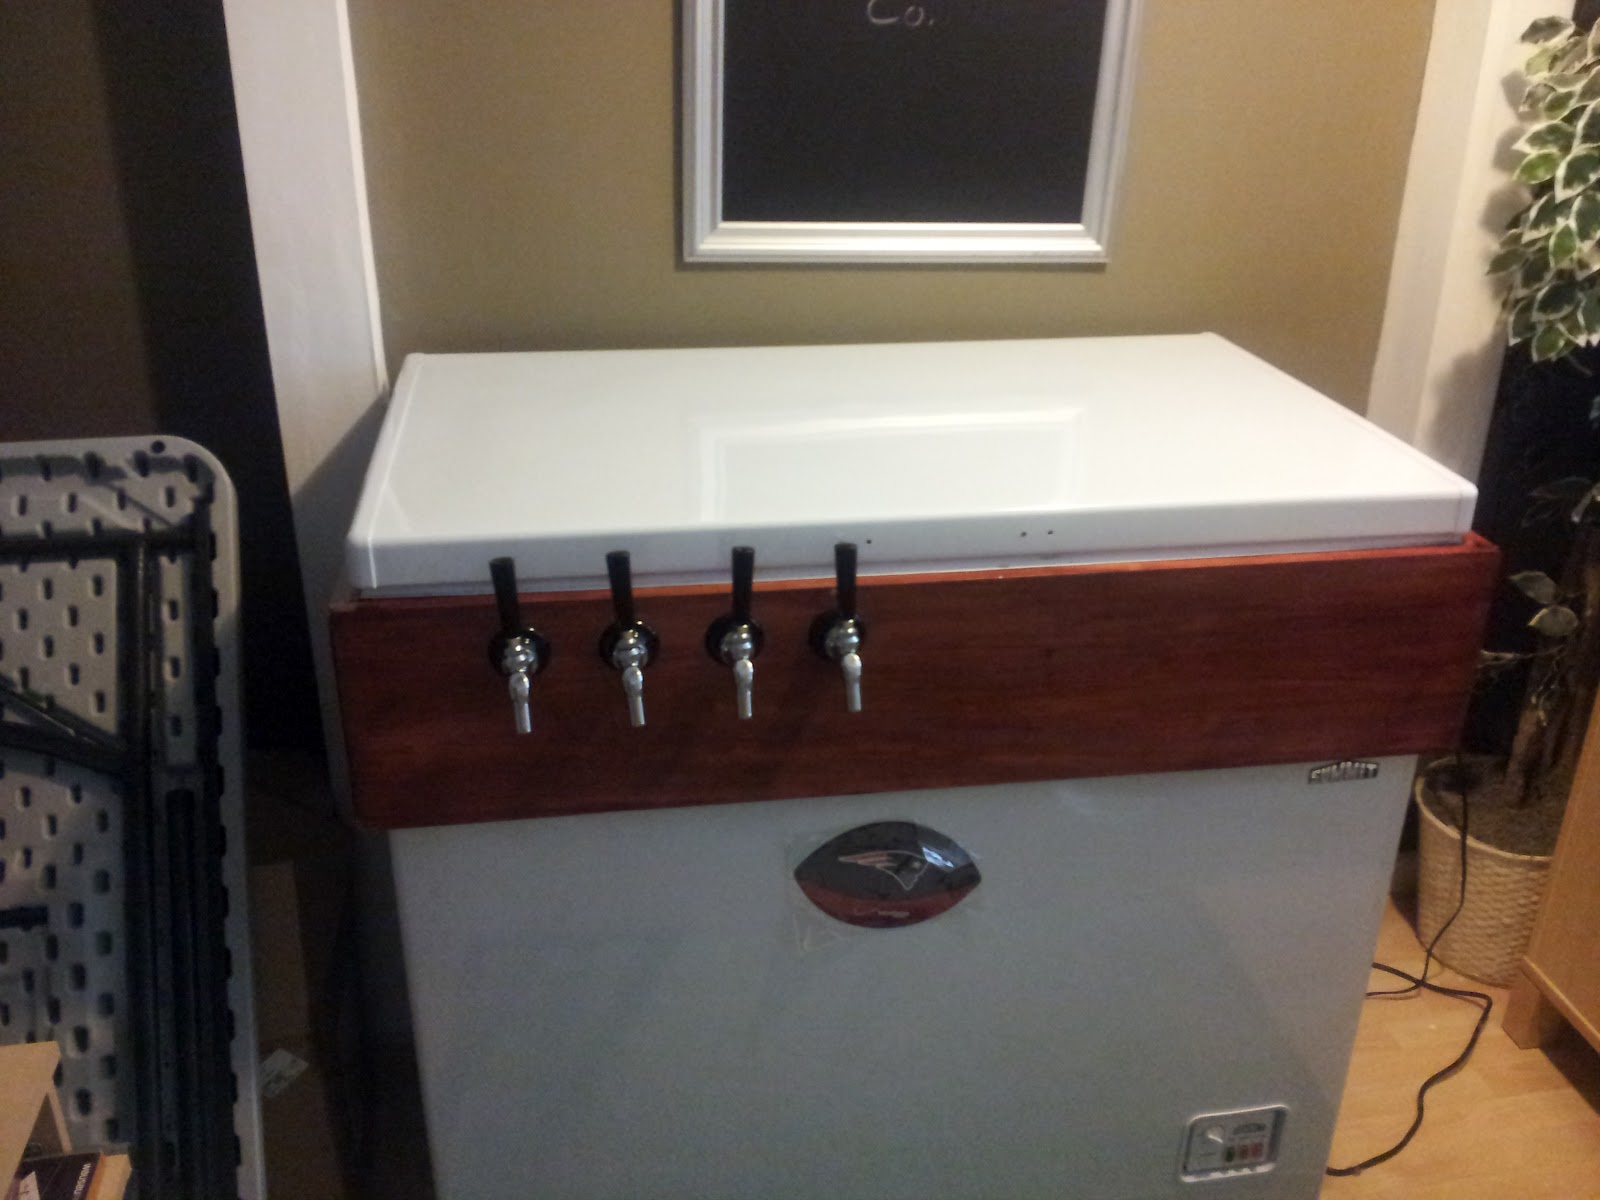
Being a home brewer, I am always looking for ways to save myself time What I have found is that I HATE rinsing, de-labeling, and sanitizing bottles. It would take me roughly 3 hours to do the 55 bottles needed for a standard 5 gallon batch. The best day so far in my brewing career has been switching to kegging. Only 1 vessel to clean, and you can drink the beer the same day you keg it, (with some shaking magic). And so I began my search for a kegerator and I ended up deciding on building a Keezer, a freezer converted to a kegerator.

The problem I was having with the standard Keezer builds was that they didn't allow for enough height over the compressor pump, and so I ended up needing a taller collar, additionally I am a taller person so not having to bend over is a great help!

Cheap and Easy Fermentation Chamber Build (Blood Sweat and Beer Build)

Back Story: 

So, I recently had won a bet with SWMBO (She Who Must Be Obeyed), and my prize purse was $60 in my own slush fund.

Now on to the build:

So this is just a port and consolidation of my build thread on HomeBrewTalk.com, my original post can be found here: http://www.homebrewtalk.com/f51/cheap-fermentation-chamber-335729/, but this has been cleaned up to show just the final build and no comments in between posts.

I have decided that I want to build a fermentation chamber. I have been looking at a lot of other ones, and as an engineer I like to tinker, and abuse things (using them for things other than they were originally intended). 

I have looked at the "son of a fermentation chamber" as well as some other options and I wasn't exactly pleased with them, so hence me making my own.

My overall goal with this project is to find a solution that works, given some restraints:
  • It has to be under $80 total, ($20 is from what I had left before the bet).
  • It has to fit in a corner of my bar room, as I live in a row house, and that is my only sanctuary.
  • I'd like it to hold 2 6.5 gallon carboys.
  • I would prefer to use a mini fridge or it's guts because our freezer is kind of full and can't handle liter bottles in it.
  • I would preferably like to have it raised off the ground a little bit as to make it easier for racking purposes.
  • I would like to have a view window, so that I can look at it, if not a door will suffice so that I can peek in.

This is a rough diagram of what I envision the final product to look like, however as we all know once you start building things don't always work out the way you initially plan them. 


So I ended up finding and re-purposing a wire frame that we had leftover and lying around the house, I ended up taking out the middle shelves, and then I put a 6.5 gallon and 5 gallon carboy inside to make sure they fit. Which they do. It also fits two 6.5 gallon carboys at the same time.


So here is the cut-out plan for the EPS foam sheet that I ended up getting: 


Tuesday, August 20, 2013

First Post

This blog is a catalog of my bemusing during brewing as well as building things and life in general. And a place to organize my thoughts and creations.